HomeLayoutsOff the PageTutorialsEverything ElseMy Resume

Friday, November 30, 2012

HELLO KITTY GOES FISHING

My daughter went on a fishing trip this summer with her company and had a ball! On this particular day she caught the largest fish in her group! You would think that she would be beyond Hello Kitty by now, but she still loves her....so much that she ordered a Hello Kitty lure on line, but didn't use it. 

This layout was made from old papers and embellishments from my stash. I made the flower from May Arts ribbon and placed the lure in the center and hand stitched around the border. A
lso used is a Hello Kitty Die Cut by Sizzix and paper that I found at Michaels and added Stickles to it. The bling is by K & Co. 

Sunday, November 25, 2012

GINGERBREAD HOUSE INSTRUCTIONS


Below, is the recipe for the gingerbread and the Royal Icing. Feel free to copy it.                       


Tips for making your gingerbread house:

1. After baking gingerbread, let it sit out to harden for two days before decorating.

2. Use a 12"X 12" corrugated cardboard surface as a base for your house. I buy mine at a craft store in the cake baking department.

3. When you begin to construct your house, mark off the "foundation area" with a pencil. Then,  with icing, draw  along two of the adjoining lines.   You will have one side and either the front or the back of the house. Before these two walls "go up", draw a line of icing (onto the gingerbread) where they will meet at a 90 degree angle. This will make one corner of the house. Now, draw another line of icing on the base and one on the next corner. Repeat this process until all four walls are standing. The icing dries pretty quickly, and it will harden nicely, so don't worry about the house falling in on itself. Decorate the outer sides of the house before adding the roof and chimney. Decorate the roof, chimney and the landscaping of your sweet new cottage. 
Merry Christmas!!! 

Saturday, November 24, 2012

GINGERBREAD HOUSES

About thirty years ago I began making gingerbread houses before Christmas. My children helped me and we had a grand time doing this activity together. One year we actually made a gingerbread house in orange and black for Halloween! Later, when I went back to teaching I had my second graders make a tiny gingerbread house by using a milk carton and graham crackers. A couple of room mothers came to help and each child was issued a zip lock sandwich baggie half full of icing. We snipped one of the bottom corners off of the baggie and it acted as a pastry bag. I had warned the students ahead of time to not eat any candy until their house was completed.  A little while later I looked across the room just in "the Nick of time" to see one little boy holding the icing bag above his mouth and squeezing the icing bag just as hard as he could! OK.....so he got me on a technicality. He wasn't eating the candy. He was eating the icing!!!

My children are now grown and busy with their own lives, so I invited my friend, Ann , to make a little gingerbread house with me. Her kitchen is decorated in a gingerbread theme at Christmas and I knew that she couldn't pass up this invitation!  
We had so much fun laughing and being together that the making of the gingerbread houses was secondary to the fellowship. 

Before decorating the houses we spent a day shopping for candy, then baking our gingerbread in our respective kitchens.
Above, are all the ingredients ready to be mixed together. 
After mixing the dough, it has to be kneaded  for a minute or so. 
Then, the dough is rolled out onto a cookie sheet. I used the rolling pin of my paternal grandmother.  She was a wonderful cook and hopefully, she would be happy that it is still being put to good use. 
The patterns are then placed on the dough and trimmed around the edges carefully. Pull away the dough that is between the house "parts", place in the oven and bake.
Mmmmm.....the fragrance of gingerbread is in the air!!! The house pieces have to dry for at least two days before assembling the house. 
This is the roof of Ann's house. I really do like the criss-cross design she applied, then put an M and M where the lines intersect. 
My gingerbread house is guarded by a tin soldier.....isn't he cute? There is a little penguin next to the front door to welcome all friends and family for the Christmas season. 
It looks like we caught Santa going down the chimney!

Tomorrow, I will be uploading the recipe for the gingerbread and the Royal Icing with dimensions of the house pieces. Hope to see you  back here then. 

Thursday, November 15, 2012

TOO BLESSED TO BE STRESSED

 This layout is going to be part of an album that I give to my son, Lee, for Christmas. The photo of him was taken while he was at work. It looks as though things were kind of crazy that day. I think he was stressed, don't you? .... LOL I just had to scrapbook this photo. Techniques used here are masking, 3-D work, painting, distressing and inking. The masks used here are by Prima and Crafter's Workshop. I also used Tattered Angels Glimmer Mist and some acrylic paint from the craft store. I had to mix a couple of colors to get what I wanted, then paint over the first layer with a darker blue. The jute twine has been in my stash forever. 
Here is a closeup of the 3-D work. Thanks for all of your comments! 

Tuesday, November 13, 2012

TEA FOR TWO

This layout was created for The Crafty Scrapper design team. Yes, that photo is me as a teenager and enjoying life.

Below, you can see the 3-D work that I did using three layers of this pretty little teacup. Instead of using pop dots I used foam from the craft store and cut it a little smaller than the cup. 
Other techniques used were inking, fussy cutting, die cutting and sewing. 
Products Used:

BO BUNNY PRESS
     Little Miss Collection patterned paper
     Little Miss Collection brads
CRAFTER'S WORKSHOP
     Mini Birds of a Feather
LIQUITEX
     Modeling Paste
MARTHA STEWART
     Vintage Floral Punch Around the Page
MAYA ROAD
     Antique Treasures Button
     Vintage Leaf Pin
     Vintage Wood Mini Butterflies
MAY ARTS
     Ribbon
PETALOO
     Devon Collection Flowers, Brighton
     Flora Doodles Mulberry Flowers, Camelia

TATTERED ANGELS
     Glimmer Glam, Lipstick Pink
     Glimmer Mist, Vintage Pink     
This is a close up of my work with modeling paste and paints. First, I spritzed the Tattered Angels Glimmer Mist, then splattered the Glimmer Glam. I enjoyed working with the modeling paste so much that I went a little crazy with it and applied it to the wooden butterfly. What a treat to get a little artsy!!!

Thursday, November 8, 2012

DON'T LEAVE HOME WITHOUT IT

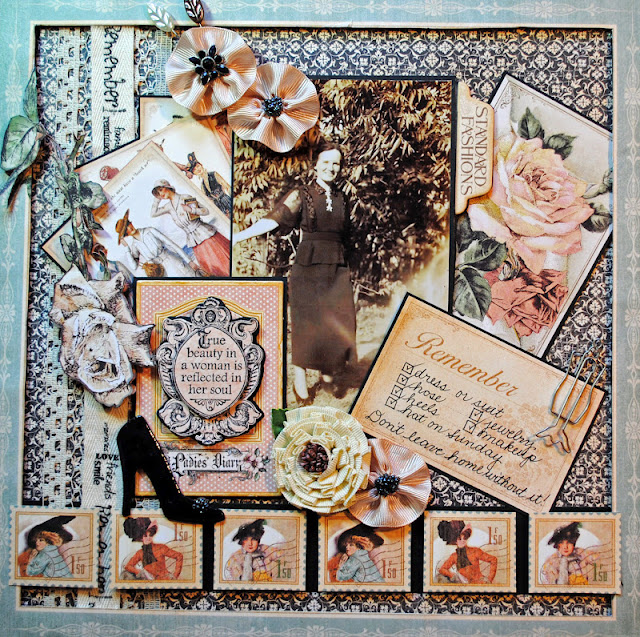
It was difficult to not think of my maternal grandmother while working on this layout for The Crafty Scrapper Design Team. The Ladies' Diary Collection by Graphic 45 is a perfect choice for a lovely photo of Granny, and to tell her story. She was born late in the nineteenth century and our culture was very different. Sometimes I wish that we could go back to those times when there was more of a sense of formality. At the top of the layout is a little tab that is attached to a hidden file folder which can be pulled out for the story about Granny, and how she would never leave her home without being "presentable". She would never be caught wearing slacks and didn't own a pair of jeans. She had beautiful suits and matching hats for Sundays, and she was lovely to gaze at in all her finery. 
Products used: 
GRAPHIC 45
     Ladies' Diary Collection, paper and stamp

MAYA ROAD
     Antique Treasures Buttons, Onyx
     Medallion Flower, Cream
     Metal Vintage Trinket (dress form)
     Vintage Leaf Pin, Pearl Cream
     Vintage Leaf Pin, Pearl BrownMAY ARTS
     Ribbons and lace
OCTOBER AFTERNOON
     Chipboard Shoe
RANGER
     Adirondack Paint Dabber, Pitch Black
     Archival Ink, Jet Black
     
Inkssentials, Glossy Accents
     
Techniques used on this layout include inking, sewing, three dimensional work, interactive work,  stamping, painting, fussy cutting and layering. In the photo above, can be seen a flower that I made by gathering a ribbon along one side and created the center by using black beads from my stash and Glossy Accents. For the shoe, I painted it black, then covered with Glossy Accents. To decorate the shoe, I punched a hole with a 1/4" hole punch, painted it black, covered it with Glossy Accents, then added beads and added another layer of Glossy Accents. 
Here is a close up of the tab that pulls out to reveal the tiny file folder. 

Tuesday, November 6, 2012

VERY IMPORTANT
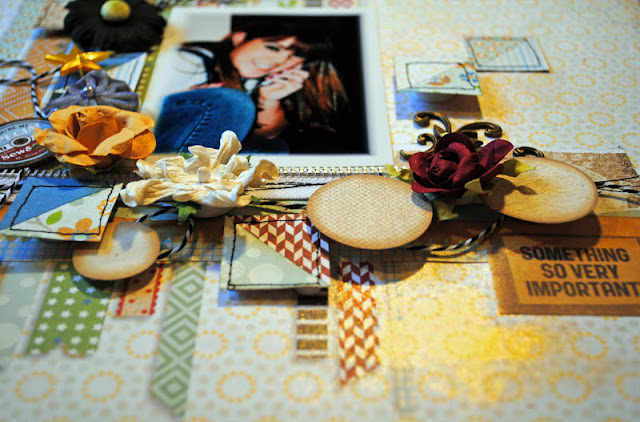
I remember when my daughter was on the phone seemingly 24-7. There were so many important phonecalls! It has been about eight years since this photo was taken, but not much has changed. If she's not taking calls for work, she's texting her friends. It is definately "The Information Age", and she has a lot of information to pass along!

Products used:

Basic Grey:
     Clippings Collection
Maya Road:
     Velvet Pleats
     
Vintage Trinket Pins Super Star
This is a layout for The Crafty Scrapper Design Team. 

Techniques used are painting, machine stitching and 3-D work.

Wednesday, October 31, 2012

HAPPY HAUNTING HANGING POCKETS


I couldn't help myself!!!! The Graphic 45 "Happy Haunting" collection was so much fun to play with that I made several hanging pockets to put treats in and give to family and friends. 
This is the one I kept for myself....LOL!!! It is displayed in my scrapbook room right now! 
Besides the lovely Graphic 45 patterned paper, I used Stickles, trim, pom poms, wire and beads from my stash to adorn the little pockets. 
These were so cute stuffed with Halloween candy! 
You can find this one displayed at the blog of one of my sweetest, dearest friends. Here's the link to her blog:
http://poetryinapotoftea.blogspot.com/2012/10/brewing-up-some-mischief.html
Thanks for stopping by. Hope you have a fun and safe HALLOWEEN!!!

MUMMY MISCHIEF

Here's a layout that I did for The Crafty Scrapper Design Team. It is created for a photo taken of my son, Lee, when he was two or three. He was wrapped from head to toe in strips torn from an old sheet. Wasn't he just an ADORABLE little mummy? 
Products used here are Imaginisce's Monster Mash Collection patterned paper. For embellishments, I used  Maya Road's Vintage Burlap Roses, Burlap Trim, Tule Pleat Trim, Zipper Trim, Trinket Pin Star, Time Flies Kraft Clock, and the Jonathan Mini Alphabet. The beautiful Fall leaves are by Prima and the beads, thread and button are from my stash. Also used are Grunge Board by Advantus, Ranger Crackle Paint, and the Graveyard die cut by Tim Holtz/Sizzix. In addition, the Martha Stewart Spiderweb Punch Around the Page and We Are Memory Keeper's baker's twine

Techniques used here are paper tearing and rolling, die cutting, painting, inking and sewing. HAPPY HALLOWEEN EVERYONE! 

Thursday, June 28, 2012

EVER THINE

It seems like just yesterday that this portrait was made of me, as a student at Texas Christian University. My soon-to-be husband and I were dating and very much in love. How happy I am to say that we have now been married for thirty eight years and it doesn't even seem like ten years! This is the first half of two companion pages to celebrate our anniversary in May, 2012.    

Products used:

     PRIMA
          Almanac Collection
               All paper and embellishments 
     SHIMMERZ Iridescent Paint, Wed Wagon
     TATTERED ANGELS
          Glimmer Mist, Graphite
          Glimmer Mist, Vintage Pink
     RANGER INK/ TIM HOLTZ
          Distress Ink, Tattered Rose

Techniques used were inking, hand stitching, fussy cutting and painting. 

Tuesday, June 26, 2012

EVER MINE

This is my sweetheart. He is the wonderful man who means the world to me....even after being married for thirty eight years! He has the best sense of humor, is a hard worker, is highly educated, and is an all-round good man. I am so very lucky to have had the good sense to have said, "Yes!" when he asked me to marry him forty years ago. 

Products used:
     COPIC
          G21 Lime Green
     PRIMA
          Printery Collection
               All paper
               All embellishments
    TATTERED ANGELS
          Glimmer Mist, Graphite
          Glimmer Mist, Forrest Green
Techniques used were fussy cutting, inking, and hand stitching .