HomeLayoutsOff the PageTutorialsEverything ElseMy Resume

Thursday, August 15, 2013

Let the Sunshine In


Boys rule....what can I say? Especially the ones that are too cute for words. I created this layout for Case File 134 over at CSI. That's Color, Stories, Inspiration for those of you who are just now following me.  
Every second week of the month a sketch is provided  at CSI by the wonderful Emma Straface and everyone wishing to participate has to create a layout through their eyes, and inspired by Emma's sketch.

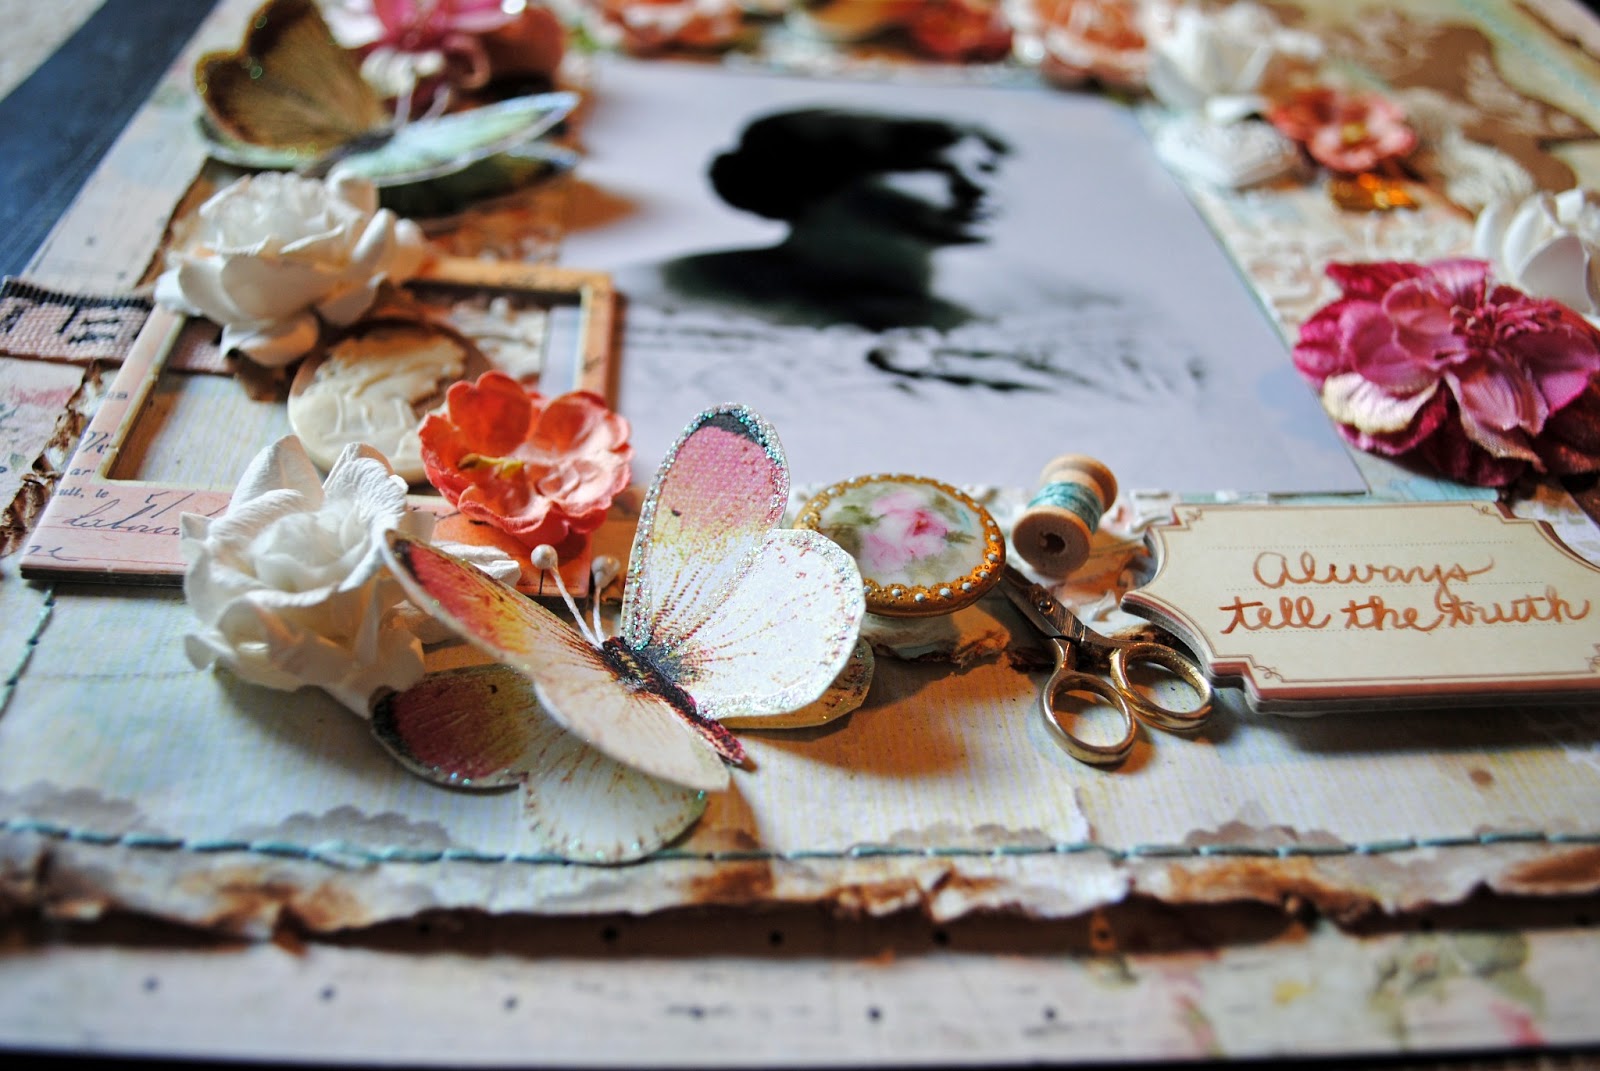
Techniques used here are border punching, inking, fussy cutting, machine stitching, and 3-D work.  


Another technique used is masking, which gives the layout a lot of texture and pattern. I used one stencil for the background circles and a second stencil with modeling paste to get the desired texture.  


Also, I doodled on the elements so they would have added interest.


You can see more of the 3-D work here and how it causes everything that is popped up to stand out!

Supplies used:


Bo Bunny On the Go Collection paper
EK Success border punch
Liquitex modeling paste
Little Yellow Bicycle Splash Collection paper
     and diecuts
Prima wooden button and heart, white metal
     frame, mask, color bloom mist
Recollections Foam Adhesive Circles
Stampabilities Pigment Ink
Stampers Anonymous - Tim Holtz layering
     stencil
Studio Callico wooden chevrons and word
From my stash: baker's twine, marker, navy
     thread 


Thanks for taking a peek! See you next time.


Wednesday, June 26, 2013

MOTHER AND DAUGHTER

This is a layout that I created to celebrate mothers and daughters. Specifically, it celebrates the love and friendship between my daughter and myself. 
Techniques used were inking, distressing, fussy cutting, 3-D work, die cutting and adding texture. In this photo each pennant is double cut and double popped up, so they appear to be floating on air. 
With the exception of a small metal heart, baker's twine and an earring that belonged to my mother, all paper and embellishments are by Prima. 

Glimmer Mist by Tattered Angels was spritzed onto the Prima Resist Canvas butterflies, and Prima Self Adhesive Jewels were added after the canvas dried. Using a Sizzix die cut created a lacy botanical addition to the page. 

I created a frame within a frame using a Martha Stewart Punch Around The Page, then cut, distressed, painted and  folded back the inner frame. 

Products Used:

Color Box Cat's Eye Ink
Liquitex Modeling Paste
Martha Stewart Punch Around The Page- Vintage       Floral
Maya Road Baker's Twine
Prima Paper- Lyric Collection
Prima embellishments- flowers, mask, bling, 
     canvas resist,resin bird, wooden ticket and              paper clip notes
Prima/Donna Downey mask- Damask
Sizzix Die Cut- Branch w/ Leaves
Tim Holtz/Ranger Crackle Paint- Picket Fence
From My Stash- small metal heart, earring

Sunday, June 16, 2013

CLAIRETTE

This layout was created with a lot of love and affection. The young lady in the portrait is my  paternal grandmother, who died when I was six years old. I wish that I could have known her for a much longer time, but it didn't work out that way. 
Clairette loved the traditional feminine past times such as sewing, cooking and painting, as was the custom in the early twentieth century. I remember looking through her box of oil paint tubes and feeling in awe of her talent. 
This little cameo was added to the layout to represent the cameo brooch that she found on the sidewalk one day as she was window shopping. She picked it up, but never discovered the original owner. 
The little beehive represents her industry. She was always busy with her many interests and with being a good homemaker, wife and mother. 
The small handpainted button is from my stash and the tiny scissors are from the Barbie house that I had as a girl.

There is a little story behind the journaling which is very meaningful to me. When my father was nearing the end of his life and he and I were enjoying some time together, I asked him to tell me the most important thing that his mother  taught him. He thought for a moment and then said that the most important lesson she taught him was, "Always Tell the Truth".

This layout was created in honor of Clairette, who was a very wise woman. 

Monday, June 10, 2013

THE CRAFTY SCRAPPER DESIGN TEAM CHALLENGE

This sunny layout and the card below were done as a challenge for the Crafty Scrapper Design Team. Paper used for this project is by Authentique and embellishments are by Maya Road and Little Yellow Bicycle. 
Using burlap trim by Maya Road and Liquitex Modeling Paste added a lot of texture.  

Dimension was added by popping up various features such as the banner, created with Spell Binders dies. Another technique used was stamping. I used a Tattered Angels stamp and Color Box ink.

A pretty frame for the photo was created with a Martha Stewart Punch Around the Page set. 
A little journaling is always necessary! 

Prima brads were attached to the butterfly to add interest. 

The paper was spritzed with a very shimmery splash of color by Fireworks and allowed to dry. Before applying the modeling paste a bit of Pearl Ex powdered color was added and slightly mixed.  Then I spritzed just a bit more sunshine over the paste.

I made this Bon Voyage card to complete the challenge. Since I was a child I have loved pop up cards, so I decided to make this happy card using Maya Road stamps, a Sizzix Pop Up die and the Sizzix/Tim Holtz picture wheel die.

Friday, May 17, 2013

Miniature Fairy Garden, Part 4 of 4


This is the last miniature fairy garden that I created last week. The little fairy seems to be looking at something in the sky.....maybe it's a kite being flown by another fairy! Thank you to my friend, Shawn, for the birdhouse. 
Again, the little fairy is from Fairy Homes & Gardens, the flowers and greenery are from Calloways Nursery and Green's Produce in Arlington.The bee skep, watering pot, garden tools, wheelbarrow, garden bench and hand tools are from  Miniature Garden Shoppe

This litttle grapevine swing and trellis are from Redenta's in Arlington. Even fairies need playtime! 
The "Faith, Hope and Love" stepping stones are also from Redenta's. 
Thanks for taking a peek at my latest fairy garden!

Thursday, May 16, 2013

Fairy Gardens, Part 3 of 4


This is the first of the two miniature fairy gardens that I made for myself. 

I have always loved being outdoors and exploring nature. So this little fairy garden is perfect for me. What a nice woodsy feel it has, thanks to the grapevine trellis and dense vegetation. 
It looks like a little cardinal is looking for a sip of water in an old, hollowed out stump.  
Look..... there's a little path leading up to a pond at the upper level....what a lovely woodland scene! It appears that there is something pink next to the water. Do you see it? 

Oh, my goodness.....it looks like a very tiny little person! Could it be an elf or fairy? No....it can't be! Yes, I think it's a fairy! 
Shhhh.....be very quiet. We don't want to scare him off! 

Tuesday, May 14, 2013

Fairy Gardens, Part 2 of 4


Here's another miniature fairy garden that I made last week. It was a gift to my mother in law for Mother's Day. The photo is a little darker than I had hoped it would be under our canopy of trees, but you can still see the entire garden. 

This sweet little Daisy Fairy is from Fairy Homes & Gardens. She is another of the lovely little Cicely Mary Barker Flower Fairies. What a sweet little face she has, and her little skirt has a scalloped hem just like a daisy. 

All of the miniature decorations in this fairy garden are from Miniature Garden Shoppe

All of the plants are from Calloways.

Thanks again to my sweet friend Shawn for getting me started with these fun little gardening treasures! Be sure to check out her fairy garden blog post.  


Monday, May 13, 2013

Fairy Gardens, Part 1 of 4

Spring is in bloom in Texas, and with the help of my friend, Shawn aka: Poetry in a Pot of Tea/ MiCupoftea. I was introduced to a past time that has been popular on the East Coast and West Coast of The United States for some time now. It has been slow coming to Texas, as far as I know. In just a short time, it seems that I have been sprinkled with some fairy dust and put under the spell of Fairy Gardening! 
This miniature little garden was created as a Mother's Day present for my mother. The little birdbath came with no water in it and no bird on it, but I managed to come up with a way to make the scene look real. At Redenta's, my local organic gardening store I found some small crushed blue glass and used it to create sparkles in the bird bath and give it a blue color. Over the blue pieces of glass, I poured Glossy Accents by Ranger for a shiny clear effect, and allowed it to dry for 24 hours. Last, I glued the little cardinal on top of the bird bath, using Glossy Accents again. 
The little planters contain small plants that were purchased at Callaways in Arlington, Texas. 
Look at this beautiful little fairy! She is part of the Cicily Mary Barker collection, whose published illustrations of fairies inspired  current day artists to create beautiful little china fairies for miniature garden lovers! This little fairy was purchased from Fairy Homes & Gardens. Isn't she lovely?

This tiny hummingbird feeder was purchased at Miniature Garden Shoppe, as were all of the miniature decorations.

Thank you Shawn, for opening the door of Miniature Fairy Gardening to me!